Month: April 2014
Organizing Your Research
 O is for Organizing

Before going further,
I think it’s a good time to ask…
How do you currently keep your genealogy research organized?
Or perhaps the better question is: Is it organized?
[Hey, I get it… I’m a piler too! No judging here.]
===
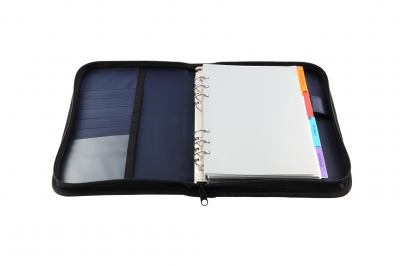 When I first started with my research, I used a 3-ring binder that could be zipped closed. I printed out my Family Group Sheets from Family Tree Maker and I kept census pages, birth, marriage and death certificates, and other printed documentation in the notebook. My direct ancestral lines were in indexed sections and information on collateral lines was put in the back and indexed alphabetically. It was simple and fairly well organized.
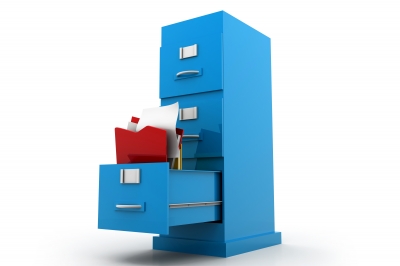 Years later in an attempt to feel even more organized, I took everything out of my notebooks and put them in file folders and put the file folders in plastic file boxes. It may just be a personality flaw because I am one of those “out of sight, out of mind” people; but I have to say, I hate it. I want it all here in front of me and easily accessible.
Since picking back up my family history research, I’ve had more than a few thoughts about reorganizing yet again. First off, I would like to become as paperless as possible. I think whomever I pass my research off to in the future will thank me when they receive a flash drive along with a few notebooks rather than boxes and boxes of paperwork. The second thing is having everything easily accessible on my computer with cloud storage and the use of OneNote and Family Tree Maker.

So I am beginning the process of taking everything from the file folders and inputing it into the computer. This involves scanning documents or looking up census information and other information to download to the computer and more. In going through everything again, I am able to double check what was done, what was sourced properly, and what still needs to be done, etc. The challenge is not to run off on new rabbit trails!
When I started setting up my Notebooks in OneNote, I went back to the basic system I had originally used. I will be going into specifics about my Notebooks in tomorrow’s post.
Now is the time to give some thought as to how you would like to organize your OneNote Notebooks based on how you currently have your research organized. And perhaps giving some thought to whether or not you’d like to spend some time reorganizing/revamping your old research or whether you’d just like to go forward with just your new research being stored digitally.
__________
Notes:
- Photos courtesy of freedigitalphotos.net
- Stacked papers by scottchan
- Notebook by keerati
- File cabinet by ddpavumba
- Clerk working by cuteimage
________________________________________________________________________________________
Cite This Page:
Erin Williamson Klein, “Organizing Your Research in a Notebook.” My Family History Files, 8 April 2014 (https://myfamilyhistoryfiles.com/organization/organizing-your-research: [access date]).
Please do not copy without attribution and link back to this page.
________________________________________________________________________________________
Managing Pages in OneNote
M is for Manage

After adding Sections to your Notebook, the next step is to create some Pages for your Sections. Pages are where you will be adding links, tables, maps, photos, etc., and are managed easily in OneNote.
===
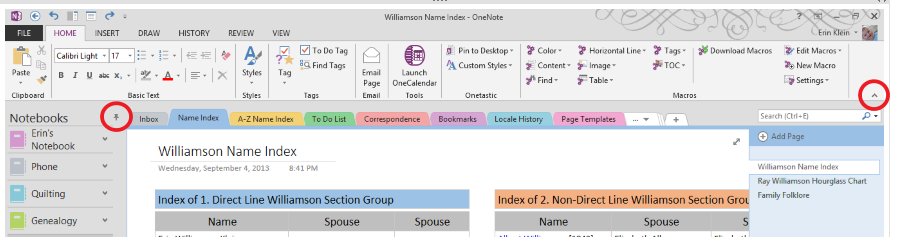
First, let’s create a little more space on our screen for our Pages. You can collapse the Notebook Navigation Menu by clicking on the small Pin at the top right of the Menu. One other thing you can do is click on the small Arrow at the bottom right on the Home Navigation ribbon. This hides the ribbon and gives you more room on your screen to view your Pages. To view the ribbon again, just click on the Home tab. If you want to leave it showing, click on the Pin at the bottom right of the ribbon. (The pin shows up when you have chosen to hide the ribbon.) Most of my screen clips from here on will be without the Notebook Navigation Menu and the Home Navigation ribbon.
===
When you create a Section, it is automatically created with an untitled Page. Whatever you type into the box at the top left of the Page will be the Page Name shown in the Page Navigation Menu. Pages can be oriented on the right of your Notebook…
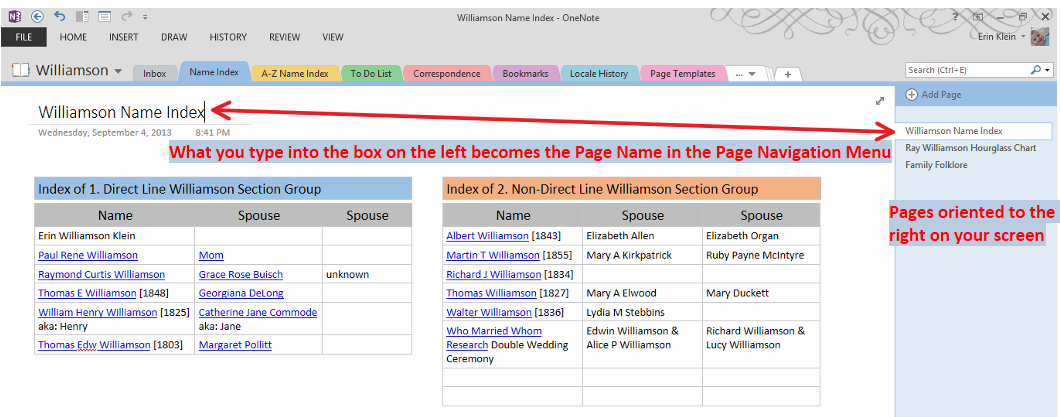
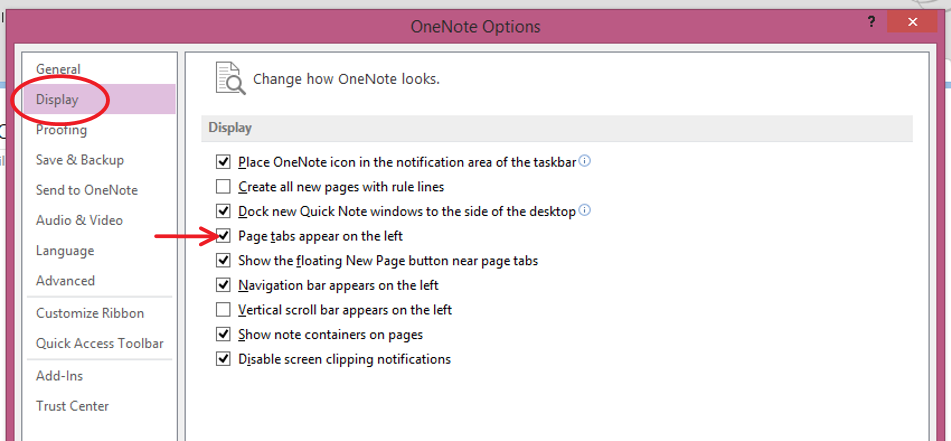
…or the left of your Notebook. I like my Pages listed on the left. To change the orientation of where the Pages are displayed in your Notebook, Click on File > Options > then choose Display. Check or uncheck the box: Page tabs appear on the left.
===
The easiest way to create new Pages is to Click > Add Page at the top of the Page Navigation Menu. An new untitled Page will appear at the bottom of your Page Navigation Menu. You can add new Pages by Right Clicking on the Page Navigation Menu and choosing New Page from the menu displayed. You can also use the shortcut: Ctrl+N.

Pages can be Moved by Clicking and Dragging them where you want them to appear in your Page Navigation Menu.
Subpages—shown as an indented Page name—can be easily created by Clicking and Dragging the Page tab to the right or by choosing > Make Subpage from the menu display that appears when you Right Click in the Page Navigation area. You can create as many Pages and Subpages as you need.
===
You can Move and Copy Pages to other Sections and other Notebooks if you find you need to reorganize your Sections and Notebooks. I have all my blank Page Templates saved in a Section at the front of my Surname Notebooks. I can easily copy those Pages to any of my Sections by Right Clicking on the Page Name and choosing Move or Copy…
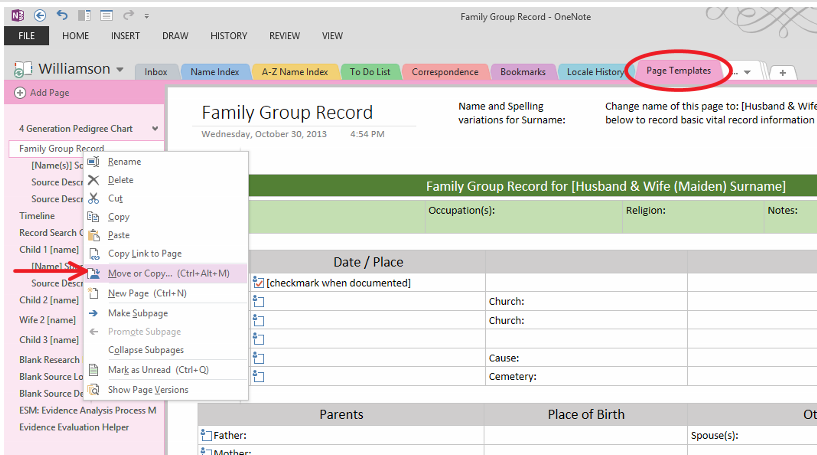
…a second window opens with a list of your Notebooks. Use the + to navigate to the Sections inside a Notebook. Choose the Section where you would like the Page to go. Be careful when you Click Move or Copy. I cannot tell you how many times I have chosen Move when I meant Copy!
If you are just moving a Page within Sections of the same Notebook, you can Drag and Drop it where you want it to go.

The same instructions apply when you are Moving or Copying full Sections as well. Right Click on the Section tab to see the menu that displays Move or Copy.
===
This page was updated on 14 April 2015 with new OneNote2013 screenshots and reworded to explain how to perform the tasks in ON2013. I deleted a portion on saving Pages as Templates in OneNote as I no longer save mine there.
===
Cite This Page:
Erin Williamson Klein, “Managing Pages in OneNote.” My Family History Files, 7 April 2014 (https://myfamilyhistoryfiles.com/organization/managing-pages-in-onenote: [access date]).
Please do not copy without attribution and link back to this page.