Posted on 6 Comments

My Work Flow

gendover wo dateGenealogy Do-Over Week 1 — 2-8 January 2015

Topic 3: Establishing Base Practices and Guidelines

I needed to do something a little different with regard to adding media and information to my genealogy software since I decided to do a separate “research” database (in Family Tree Maker) and a “sourced” database (in Roots Magic). And I still need to get a grip on the somewhat willy-nilly approach I’ve been using since finding so much information available online.

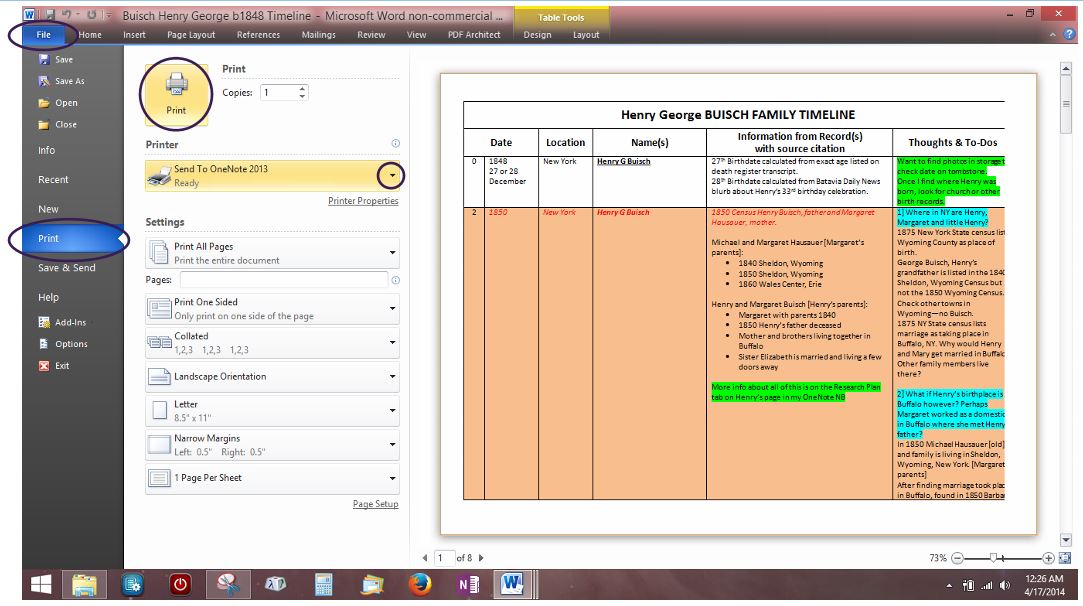
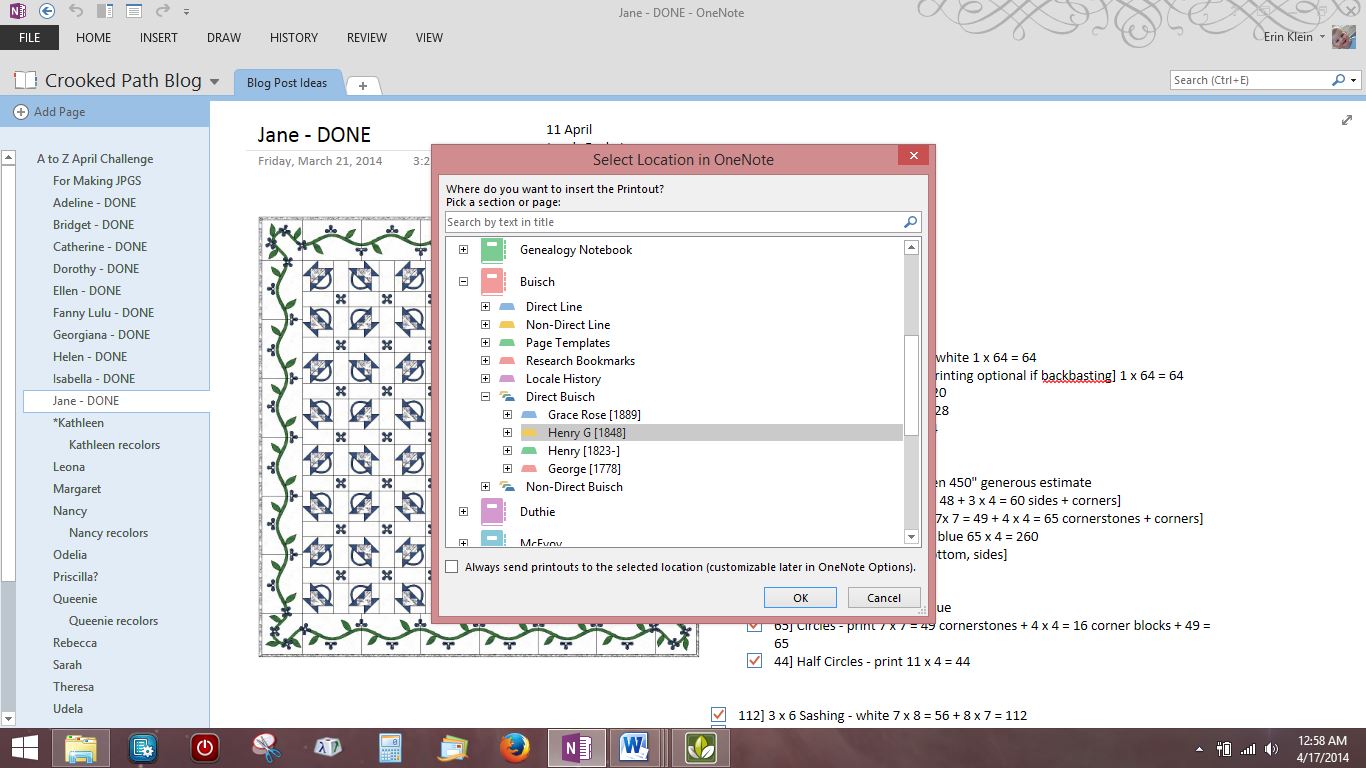
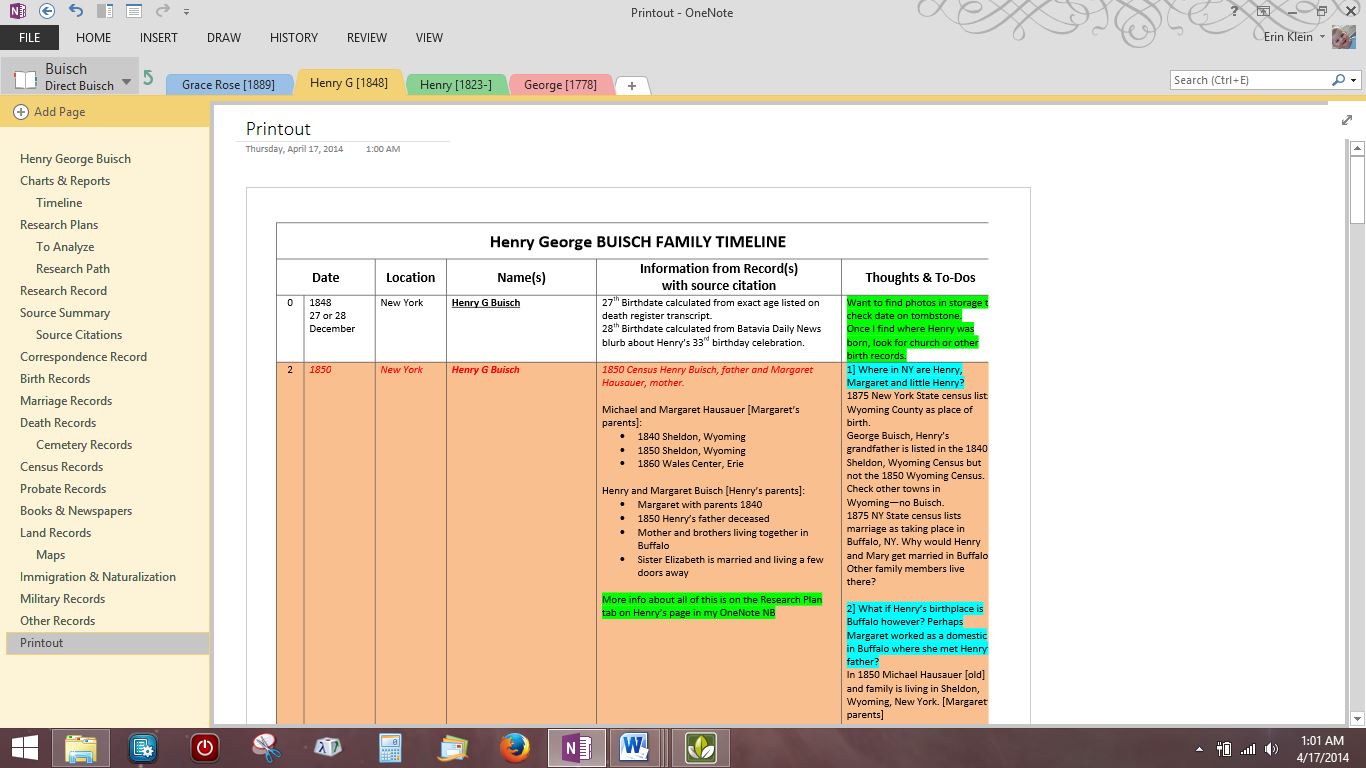
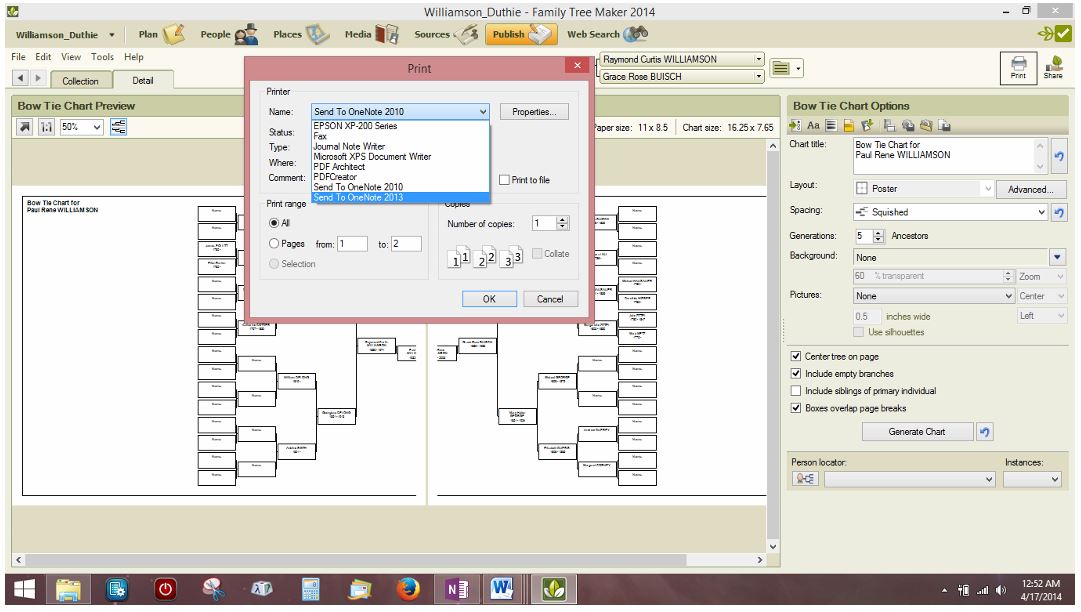
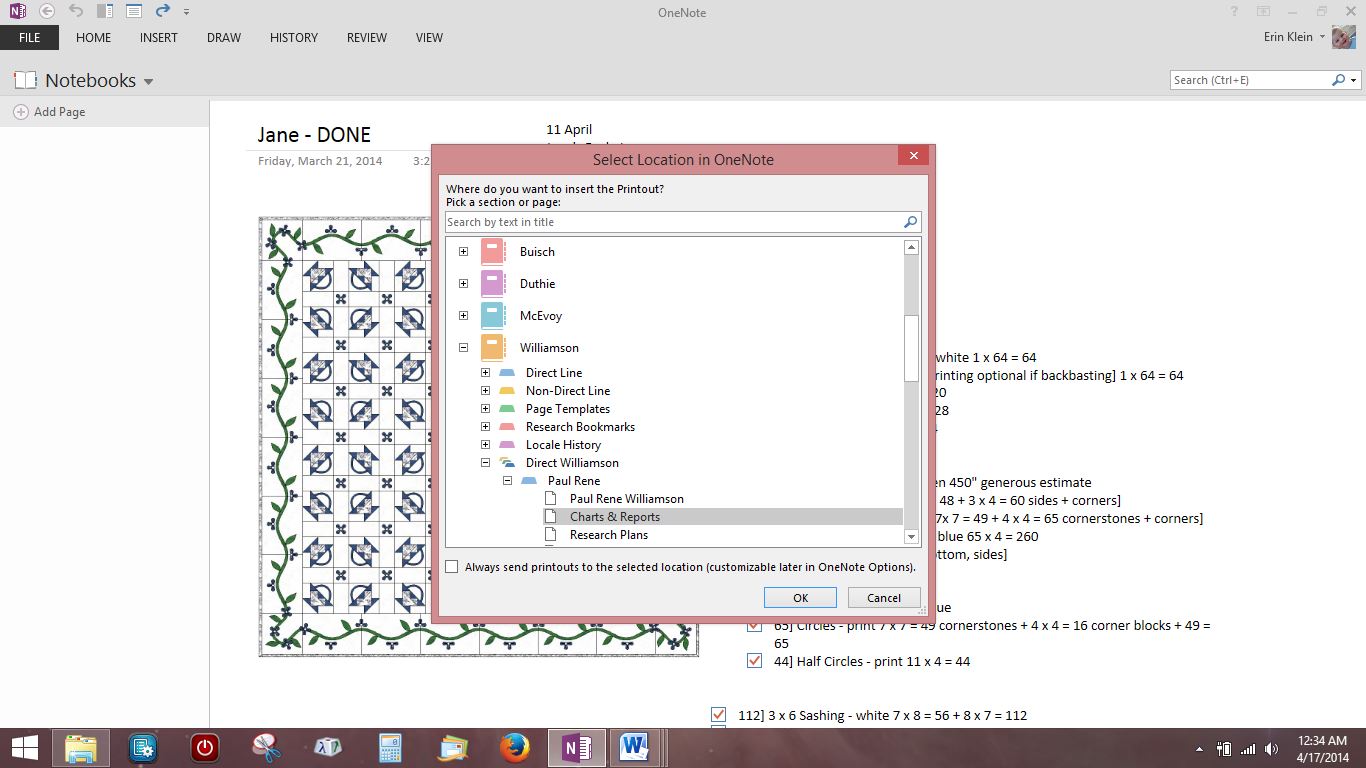
I still want to use OneNote in tandem with my genealogy software. I know some of the things I am doing in OneNote can be done in my software but the software has its drawbacks. One, I can’t spread everything out to view at once, I have to open each document separately. When I put screen clippings into OneNote, it helps to be able to “view” it all at once. Two, I don’t like either Roots Magic or Family Tree Maker’s timelines. They don’t suit my purposes as I like to make notes of conflicting or missing information right on the timeline. It then becomes the pre-research plan. Later, I can copy and paste research notes from OneNote into my software if I decide I want that information in my genealogy database. The trick is to remember to date everything so I know whether or not the software has the latest notes.

I was playing around in Scapple (mind mapping software from the creators of Scrivener) and made myself a chart back in July 2014 to illustrate (for my own purposes) how I should be working with the documents I already have. They need to be scanned, the information extracted and added to my genealogy databases. New source documents are coming in as well so they need to be dealt with.

Work Flow screenclip
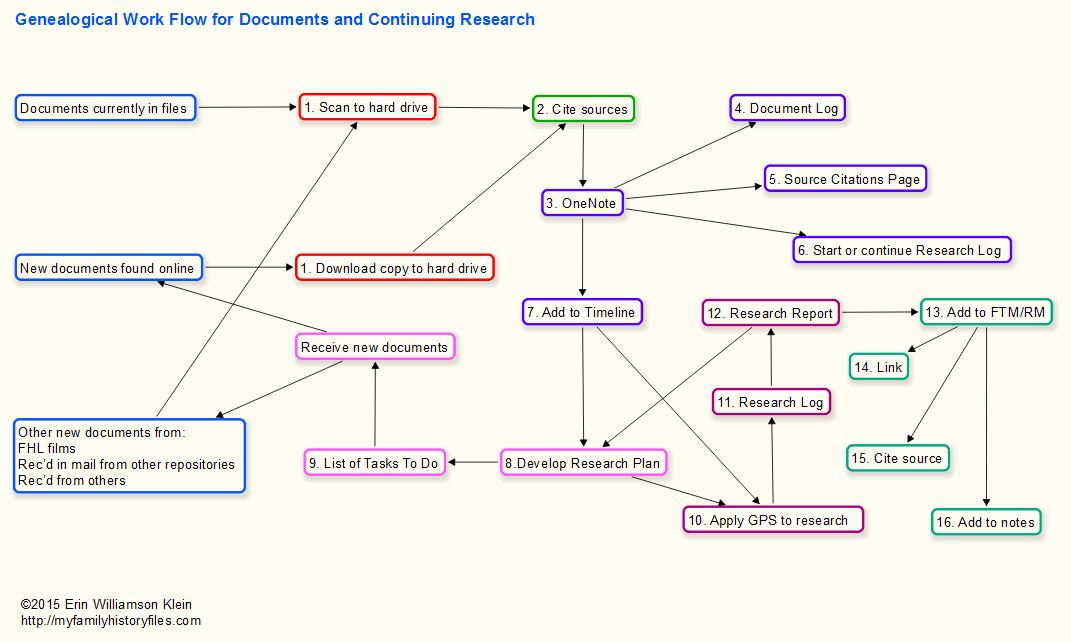
(A downloadable PDF of this chart is listed below under Helpful Resources.)

Obviously all the steps aren’t necessary for every document but I wanted a checklist of sorts to be sure that things get added to OneNote and timelines. You’ll notice that the last steps include putting the information in genealogy software. All of this is subject to change because I tweak things as I go.

Some things I still need to decide on:

  1. I want to set aside 2 days per week to work on family history. I need to pick 2 days and stick to my plan otherwise I get wrapped up in quilting for days and weeks on end and don’t get back to family history research. (Case in point is this post. I had to drag myself away from my quilting software where I have spent the last 3 days drawing an applique quilt border.) I am thinking Tuesday and Wednesday because those are the 2 days the local family history center is opened. I can only get there every other week but at least I know it would be open if I decided to go and do some research on my designated genealogy days.

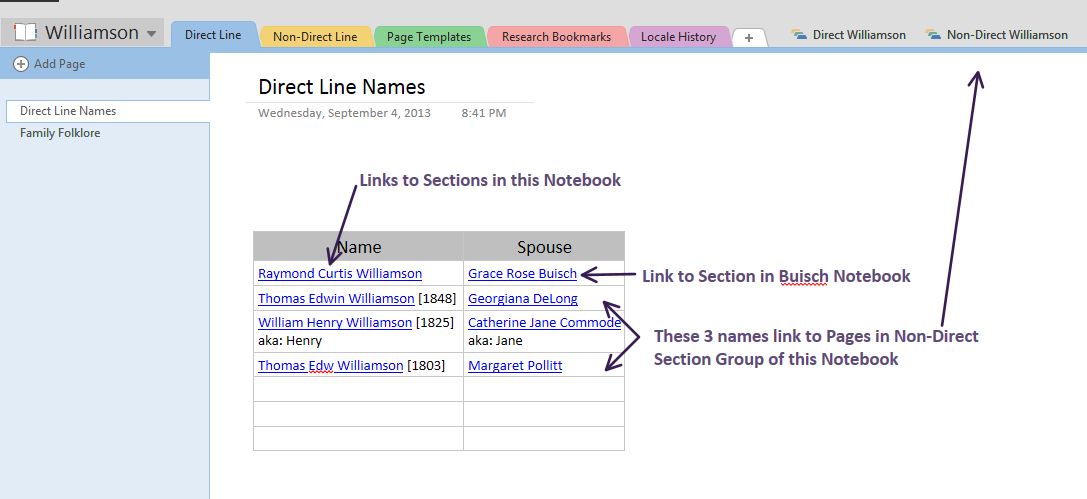
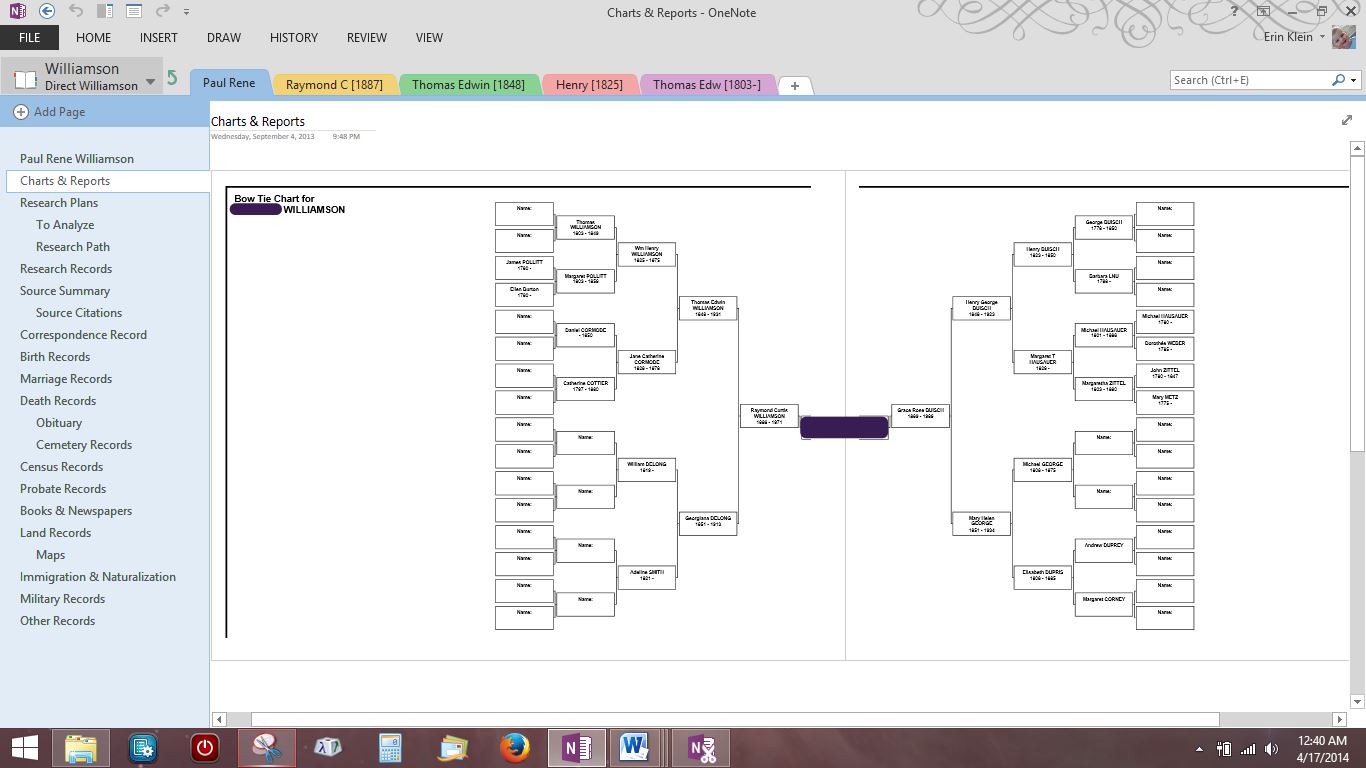
  2. The To-Do List… One long list or many little lists? I’m leaning towards one list because I like the way everything shows up in a prioritized list when I open Family Tree Maker. But the question is where to put the one list? Maybe one list for each of my 4 surname notebooks? Yes, I think I will play around with that idea. Now my OneNote Surname Notebook looks like this when I open it.

ONSurname-main-to-do

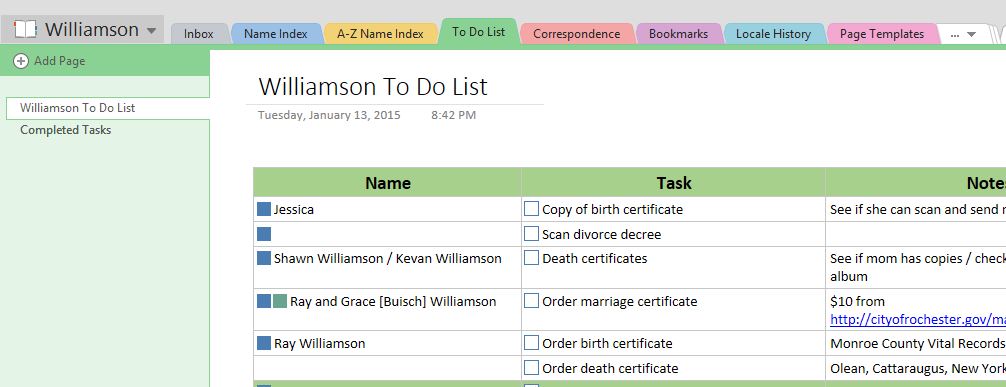
The very first section is an Inbox. Anything I clip from the web ends up in the Quick Notes section of my personal ON notebook. I then sort through those web clips and add them to the appropriate Surname Notebook Inbox unless I know exactly which Family Group Section it belongs to — then it goes there. The next section is for my new To-Do List. It’s just a tickler list of things that need to be done. More elaborate plans and information are listed on my Research Plan and Research Record in each Family Group Section.

Helpful resources:

  1. My Genealogical Workflow PDF

  2. Creating Timelines That Produce Answers from Ancestry.com

  3. A 10-Step Plan: Getting Sources & Citations Under Control by Lynn Palermo

  4. Conclusions & Baby Steps (to the evidence analysis process or GPS) available at FamilySearch.com

===

Post edited 23 April 2020 to relink Conclusions & Baby Steps article at FamilySearch.com and remove two links pertaining to a podcast also at FamilySearch.com that appears to be no longer available. This post contains affiliate links to both Scrivener and Scapple at Literature and Latte. I will earn a commission if you purchase either product through the links provided. It does not affect the price you pay for the products.


Cite This Page:

Erin Williamson Klein, “My Work Flow.” My Family History Files, 14 January 2015 (https://myfamilyhistoryfiles.com/organization/my-work-flow/ : [access date]).

Please do not copy without attribution and link back to this page.


Posted on 1 Comment

Attaching Files in OneNote

alphabet treeHere I am going to show you how to Attach and Insert Files into [onto?] Pages in OneNote. I equate “attaching” with “linking.” I am linking to a File on my hard drive, another Notebook, Section or Page or linking to information on the web.

The first place I do this in each Surname Notebook is in the Table on the Direct Line and Non-Direct Line Sections for each Surname Notebook. Both Tables combined are a list of everyone I have entered in the Surname Notebook so far.


files1

===

Making Text a Link is the same procedure you use in MSWord. Highlight the text with your cursor−in this case Margaret Pollitt. On the Insert Ribbon [menu], choose Link. I am using the “Pick a location in OneNote” option so I find my way to where Margaret Pollitt’s Page is located in my Williamson Notebook. When I Click > OK, Margaret’s name in the Table becomes a link to her Page in the Notebook.

files2

===

You can Attach a File anywhere on a Page by placing your cursor wherever you would like the Link to appear. Click > Insert > Link. You can browse the Web or Folders on your hard drive for files to link to in addition to your Notebooks, Sections and Pages. I found the folder for my grandfather’s files on my hard drive and chose the census document I needed to attach in my Table. After I found the appropriate file, I changed the Text to Display to show the year and location of the census.

files3

===

I linked to all the census documents I had for my grandfather.

files4

===

Below, the PDF icons link to newspaper pages that contain articles about a great uncle that found himself in a bit of trouble in his early twenties. I used File Attachment to add them to his Page. I could insert a copy of the newspaper page using File Attachment, however it only displays a portion of the newspaper page.

files6

In a later tutorial I will show you how to insert the individual newspaper articles as another option.

===

________________________________________________________________________________________

Cite This Page:

Erin Williamson Klein, “Attaching Files in OneNote.” My Family History Files, 14 April 2014 (https://myfamilyhistoryfiles.com/organization/attaching-files-in-onenote: [access date]).

Please do not copy without attribution and link back to this page.

________________________________________________________________________________________

Posted on 2 Comments

Printing to OneNote

P is for Printingalphabet tree

The easiest way to add a file−document, PDF, photo, genealogy chart−is to use the Print Function in the program where you are viewing the document. If you would like to “see” the file on a Page in your Surname Notebook, this is the simplest way to accomplish that.

One of the Pages that I have added to my direct line ancestors is a Timeline that I’ve made up as a table in MSWord. Shown below is the 8 page Timeline for my great grandfather, Henry George Buisch.


print1

===

To get this document into the Buisch Notebook in Henry’s Section, I would Click File > Print > Under “Printer” choose “Send to OneNote 2013” from the drop-down menu > Click Print.

print2

===

Note that I have OneNote in my task bar at the bottom of the screen but it’s not currently opened. After a few seconds, the task bar icon will start to blink. When I open OneNote, I get a window that that asks where I want to insert the printout with a list of my Notebooks. I can choose a Section or a Page inside a Notebook. I want the Timeline to be on its own Page that I will make a Subpage of Charts & Reports so I chose the Buisch Notebook and then Henry’s Section.

print3

===

OneNote opens the Notebook and Section I chose and the Timeline is added as a Page at the bottom of the Page Navigation Menu as “Printout”. All that’s needed is to change the name of the Page and to move it up under Charts & Reports and then slide the Page tab to the right to make it a Subpage.

print4

 ===

I really love this option for the Charts & Reports that are available in my genealogy software. I decided to add the Bow Tie Chart I created for yesterday’s post where I was trying to figure out how many names I would have going back 5 generations from my father’s parents to his Charts & Reports Page. Here is the chart in Family Tree Maker. Click Print > Choose Send to OneNote 2013.

print5

===

This time I chose the Charts & Reports Page instead of just my father’s Section in the Williamson Notebook.

print6

===

The Bow Tie Chart is inserted onto the Charts & Reports Page for my father. I moved the second page of the chart up to nest next to the first page.

print7

In the next two posts, I will show you other ways to attach and insert files.

===

________________________________________________________________________________________

Cite This Page:

Erin Williamson Klein, “Printing to OneNote.” My Family History Files, 12 April 2014 (https://myfamilyhistoryfiles.com/organization/printing-to-onenote: [access date]).

Please do not copy without attribution and link back to this page.

________________________________________________________________________________________