I have been busy behind the scenes working on updating my old OneNote posts, putting together some new posts and working through the Genealogy Do-Over Topics. The Research Log dilemma has me in a holding pattern where I am currently stuck in the topics for Weeks 3-5. Anne Faulkner’s (Ancestor Archaeology) Do-Over recap post had me laughing and nodding my head in complete agreement.
When my mind gets muddled overthinking things pondering life’s tough questions how I want my family history research to come together, I tend to avoid the problem give my mind a rest by pursuing some time-wasting endeavor on the computer. Just to clear my head, you know? (If you read between the lines, you might come to the conclusion that I am a procrastinator…) In my research-log-decision-making-avoidance mode, I started a new quilt design for a quilt that has a pedigree chart on it with an appliqued tree and leaves. Copying and pasting all those leaves onto my quilt design and then coloring each one with a different green fabric? Complete time-waster…
 (I know it doesn’t look like much here, but I haven’t finished the whole tree applique. Just imagine your ancestors names in the beige rectangles and photos in the beige diamonds and something like this starting at the bottom left and going out and up around the chart with leaves. Lots of leaves. But not so much detail on the trunk…)
===
I thought perhaps I should do something more productive today. Move a few things off my Task Manager To Do’s. (Like get that research log decision made and just jump into working with whatever I come up with!! Use it now, tweak it later?)
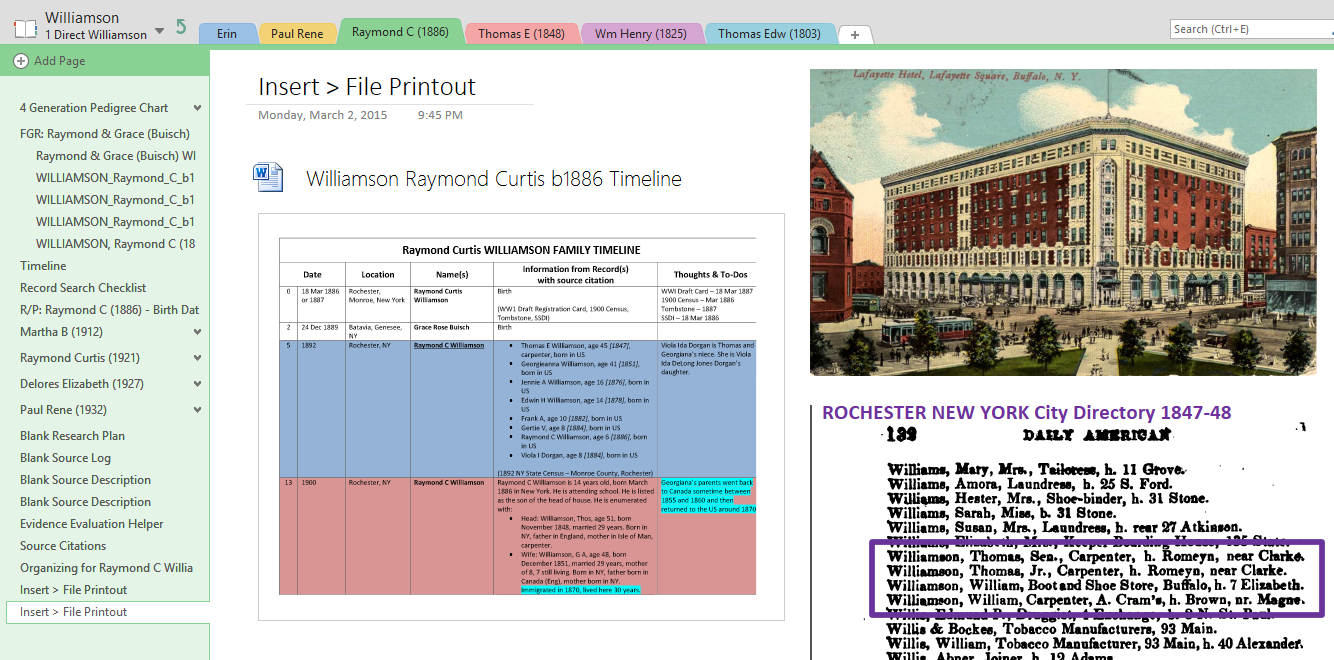
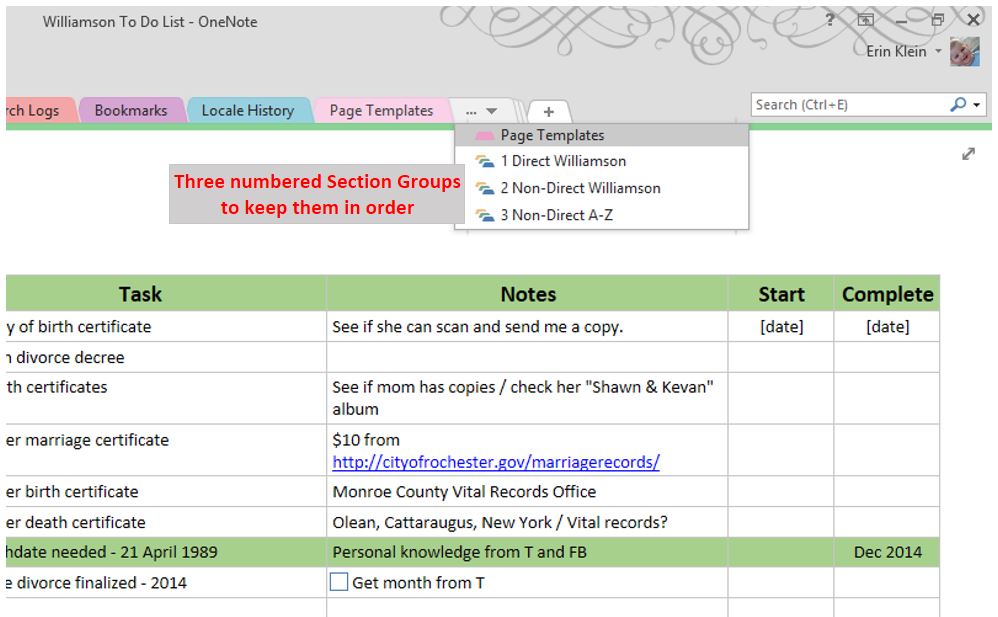
There have been a couple of questions about organizing Section tabs and Pages for each person so I thought I should address how that has evolved as I have been working in my Williamson Surname Notebook. Basically, I have changed the Section Group setup by adding a third group.
Originally I had only two Section Groups created to hold Sections for individuals in my family tree. One for the direct surname line and another for non-direct names organized alphabetically. As I started adding more and more Sections to my notebook for each person, it became apparent that this setup wasn’t going to work for me in the long-term so I reorganized the groups. For now I have three Section Groups. Section Groups alphabetize themselves and I wanted my Section Groups in a certain order so I added numbers to their names.
===
One important thing to note and something I have to keep reminding myself is I want my OneNote Notebook to be a digital duplicate of how I had my physical binders set up. My original binders were set up in family groups with their records grouped together behind a printed family group record. Once a person got married or remarried, a new family group record was created and the related family documents grouped behind it. (By the way, if you are using OneNote to share your research or to create a digital backup up of the physical notebooks you already have, for convenience and ease of setup, create and layout your OneNote Notebooks just as you did your physical notebooks!)
So rather than think that each Section tab was for an individual person, it should be that they are for a family group. (Banging my head against the desk and saying, “Duh.”) I haven’t yet decided if I am going to keep the naming convention I originally set up [male name only] or rename the Sections to include the wife/mother’s name. If I switch to adding the wife/mother’s name to the Section tab name, I was thinking I would have to add a new Section for subsequent marriages. That hasn’t been an issue for my direct-line ancestors; but as I get more into the collateral lines, I will have to give this a hard think.
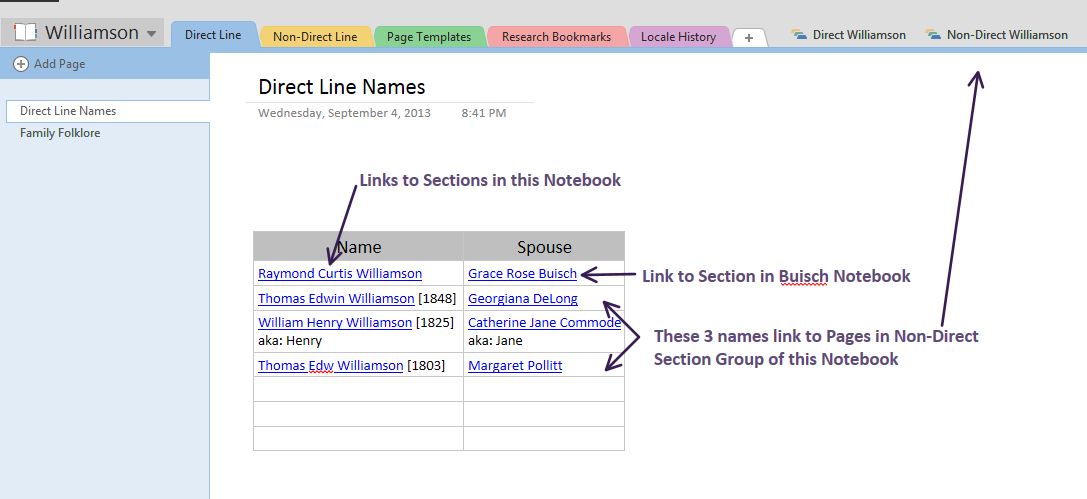
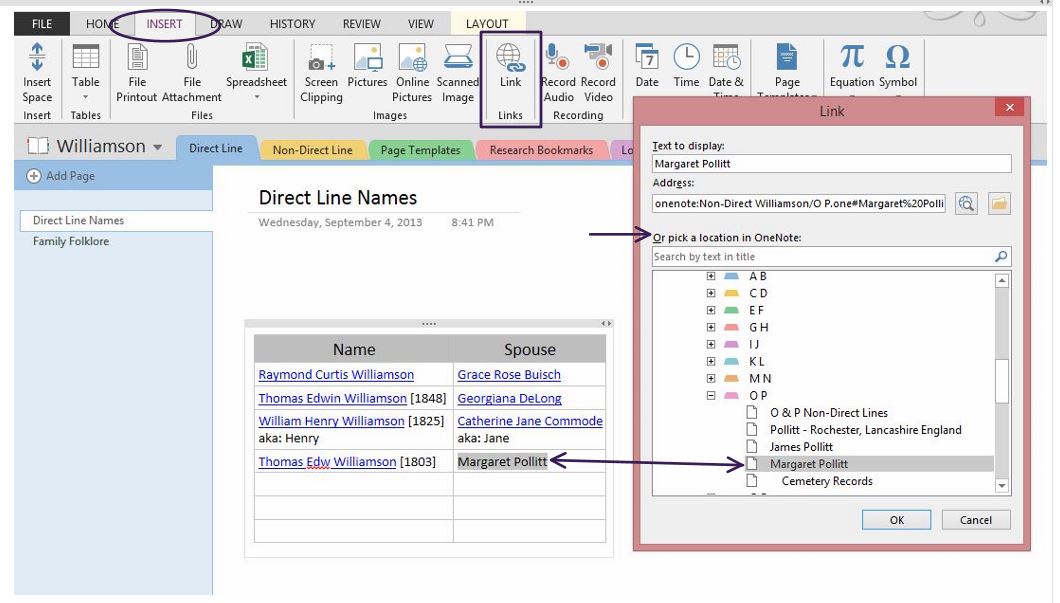
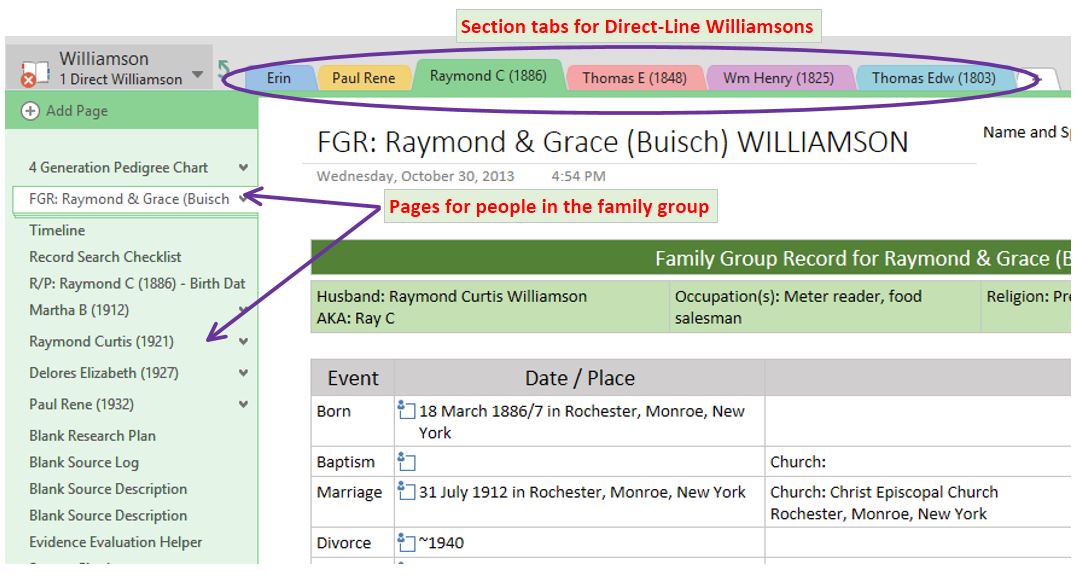
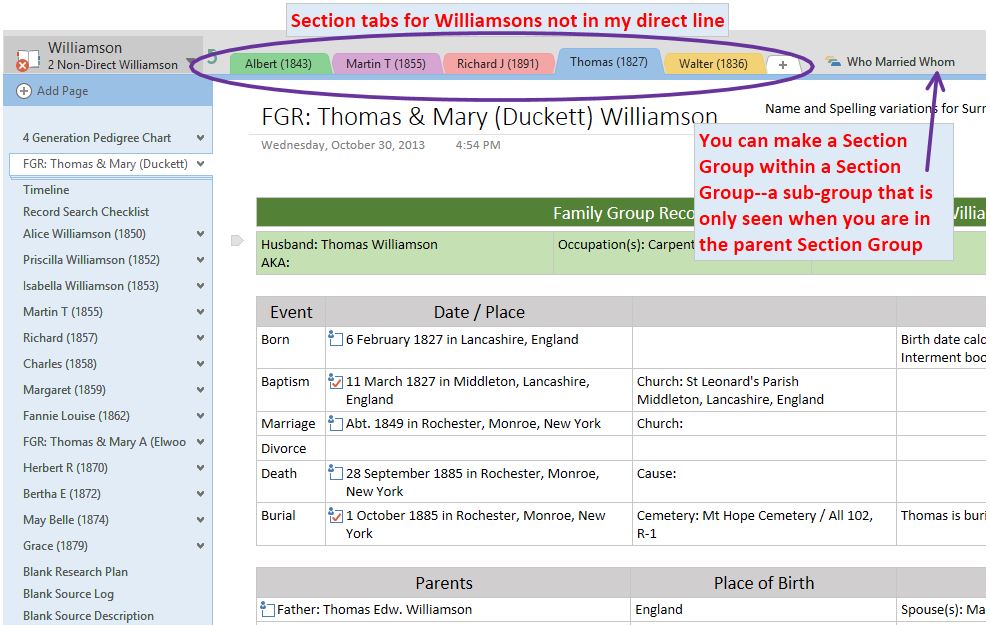
This is the Direct Line Section Group for my Williamson Surname Notebook. In each Section are Pages for people in the family group.
===
I am working on getting things in order on my direct line to start, however, I have some records for my collateral Williamson lines. As I was adding them to the original Non-Direct A-Z Section Group, it was getting a bit overcrowded in the W-X Section. I decided they all needed their own Section Group. This newly created second Section Group is for your collateral lines of the same surname. By the way, the Sub-Section Group ‘Who Married Whom’ is for a research rabbit hole. Two Williamson men married two Williamson women in a double wedding ceremony. The marriage index doesn’t list parents’ names for any of the four. I was trying to figure out which ones I was related to (all four names match people in my tree) and the resulting avalanche of records I gathered needed its own Section Group. (I’ll tell you about the rabbit hole another day…)
===
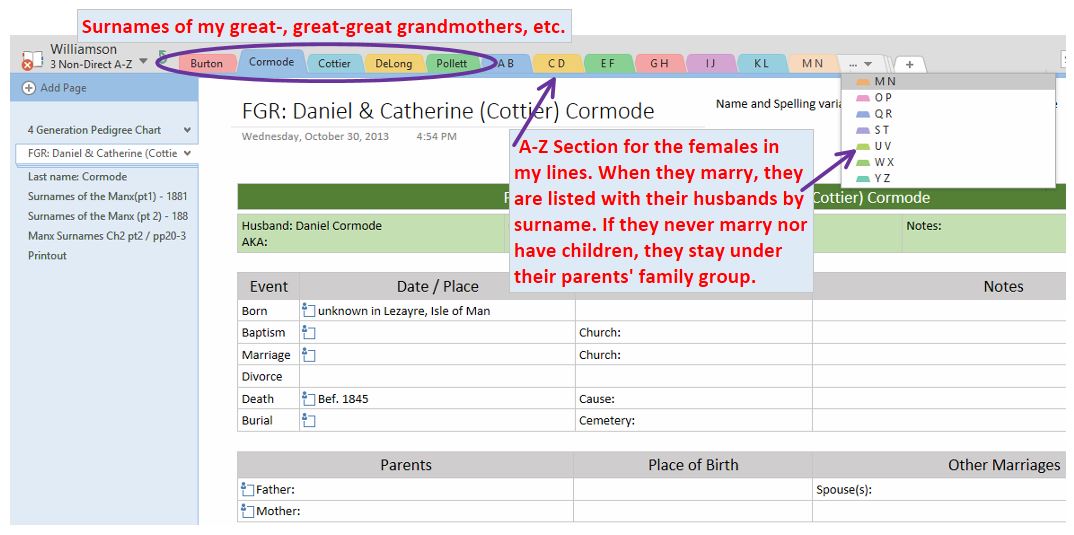
The last Section Group is for lines that have ‘married into’ my surname. Obviously that includes some new direct line surnames as well as husbands to Williamson females. For the surname for my great grandmother, great-great grandmother and on, I have created separate Sections in the front of the A-Z tabs for them. Instead of a separate Section, each family group gets a Page with Sub-Pages. If the Section gets too cumbersome to navigate (too many pages of family groups), they can be moved into their own Section Group or even their own Notebook if needed. Right now, that isn’t been a problem and I’ll think on it when I have to.
I hope that helps you understand a little bit better how I have been organizing my family groups in my Surname Notebook.
===
Part 1 – Quirks of My Notebooks – The Main Sections
Part 3 – Quirks Continued – Pages for Family Groups
===
===
This post was updated 10 April 2020 with new links to the notebooks on OneDrive.
Cite This Page:
Erin Williamson Klein, “Part 2 – More Quirks – Section Groups & Sections.” My Family History Files, 20 February 2015 (https://myfamilyhistoryfiles.com/research-plan/surname-section-groups-and-sections/ : [access date]).
Please do not copy without attribution and link back to this page.
Like this:
Like Loading...
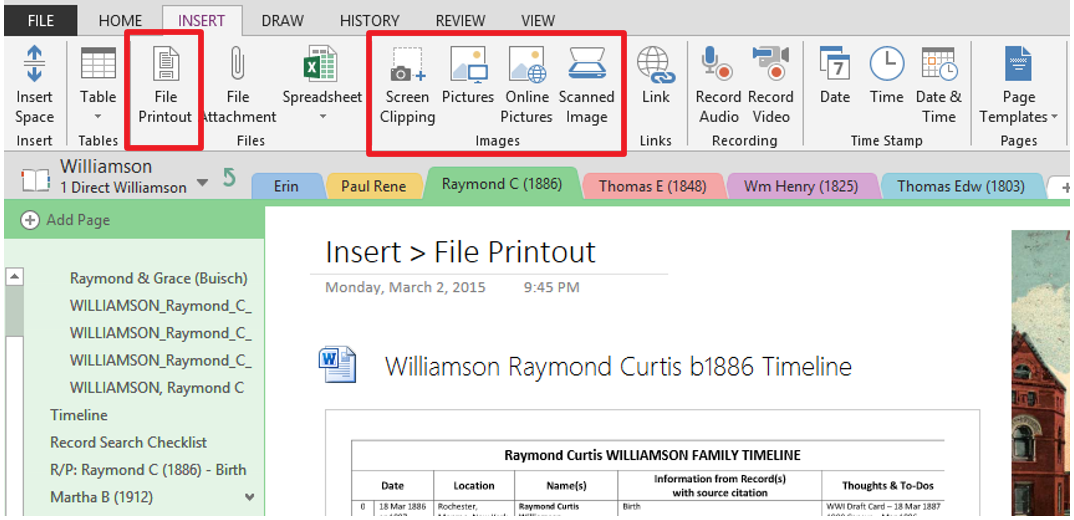
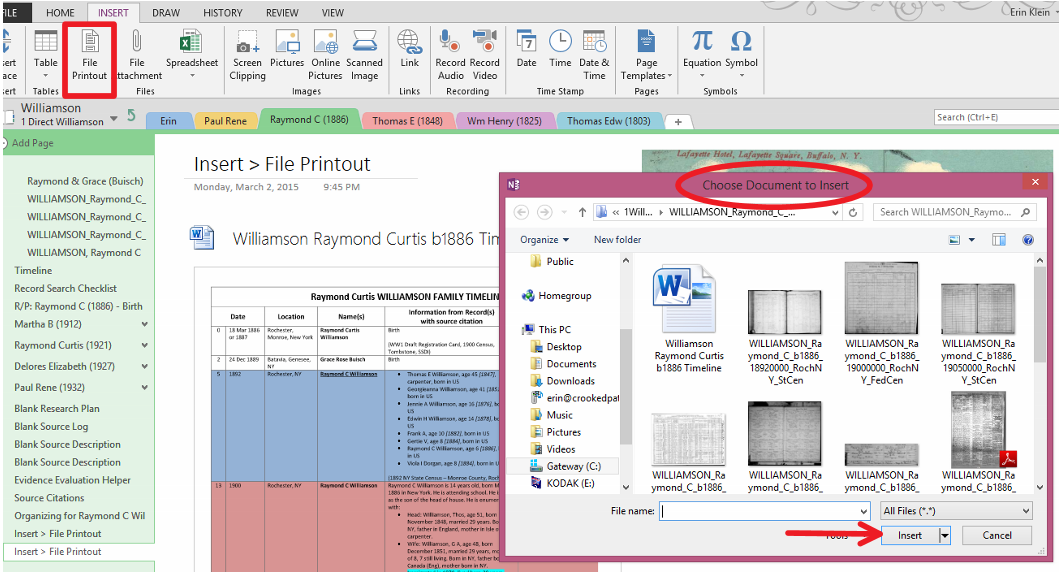
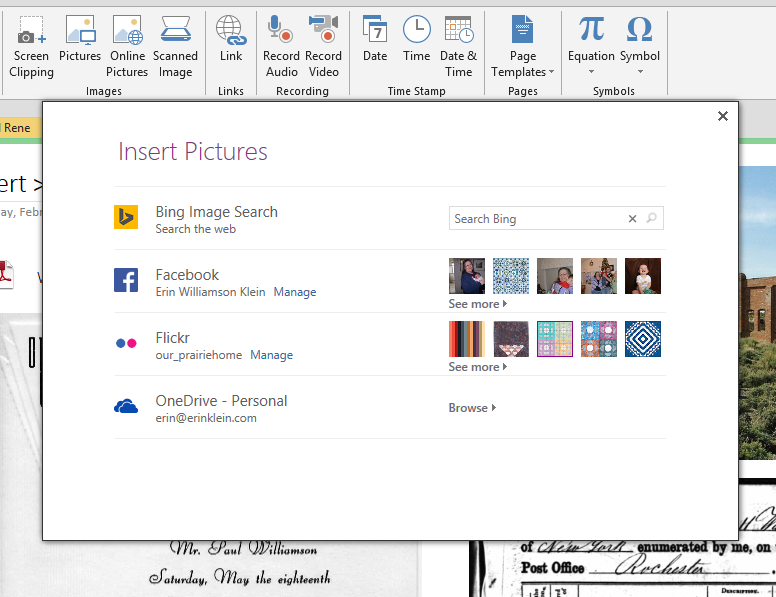
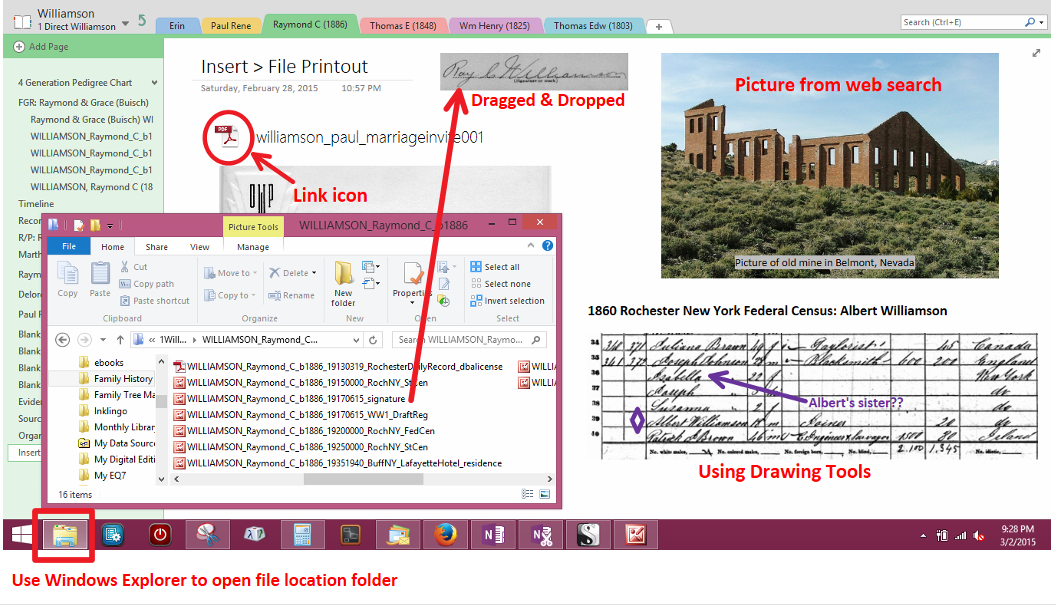
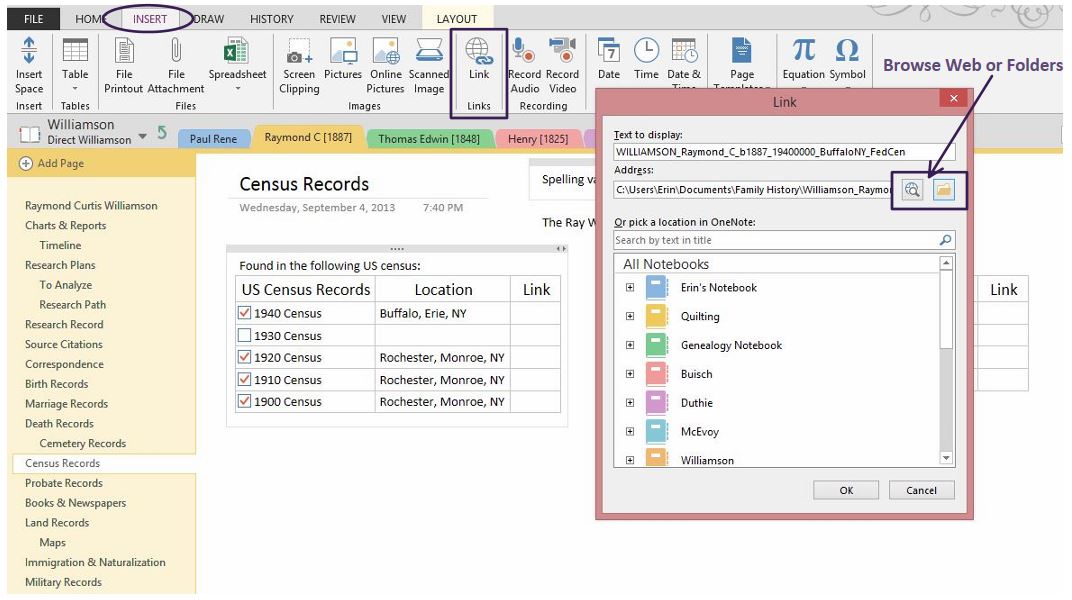
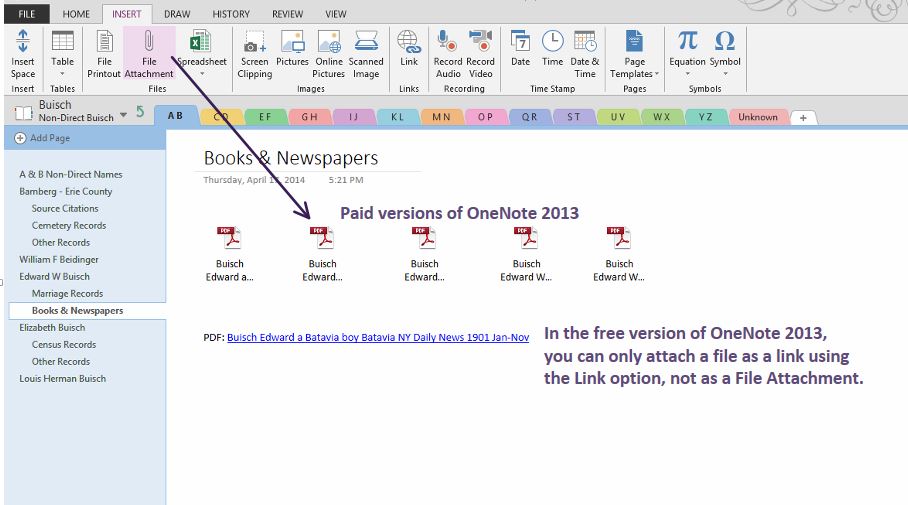
 Inserting files and images into OneNote is different than attaching files in OneNote. When you attach a file, you are linking from another source to a OneNote Page. It is link to a web page, link to file on your hard drive or link to another Notebook, Section or Page, for instance. The problem with attaching is when the source gets moved or disappears, your link may become invalid.