Posted on 3 Comments

Managing Pages in OneNote

M is for Managealphabet tree

After adding Sections to your Notebook, the next step is to create some Pages for your Sections. Pages are where you will be adding links, tables, maps, photos, etc., and are managed easily in OneNote.

===

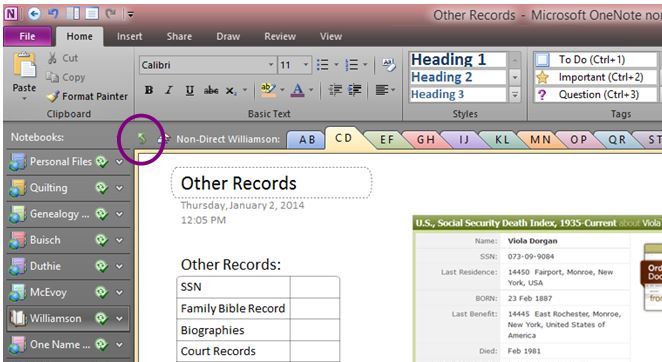
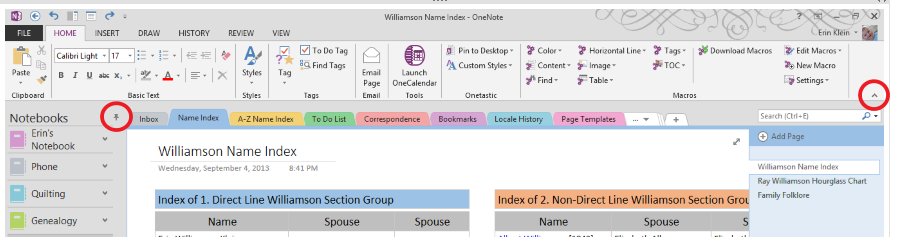
First, let’s create a little more space on our screen for our Pages. You can collapse the Notebook Navigation Menu by clicking on the small Pin at the top right of the Menu. One other thing you can do is click on the small Arrow at the bottom right on the Home Navigation ribbon. This hides the ribbon and gives you more room on your screen to view your Pages. To view the ribbon again, just click on the Home tab. If you want to leave it showing, click on the Pin at the bottom right of the ribbon. (The pin shows up when you have chosen to hide the ribbon.) Most of my screen clips from here on will be without the Notebook Navigation Menu and the Home Navigation ribbon.

manage1

===

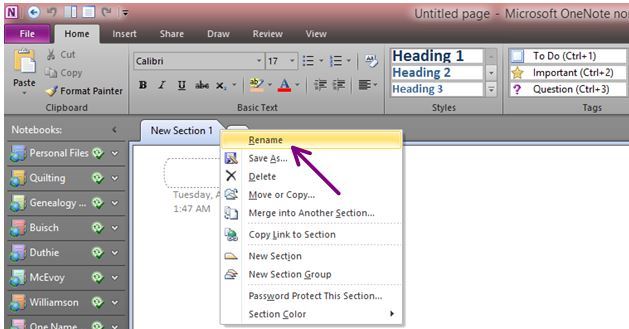
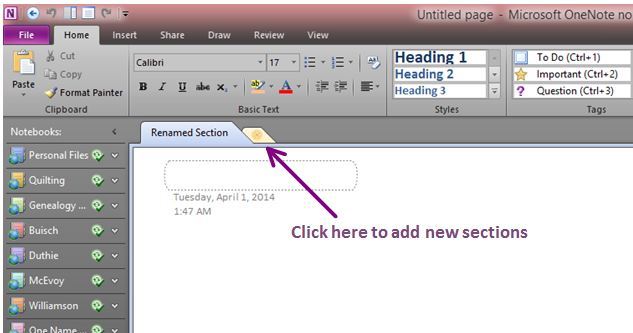
When you create a Section, it is automatically created with an untitled Page. Whatever you type into the box at the top left of the Page will be the Page Name shown in the Page Navigation Menu. Pages can be oriented on the right of your Notebook

manage2

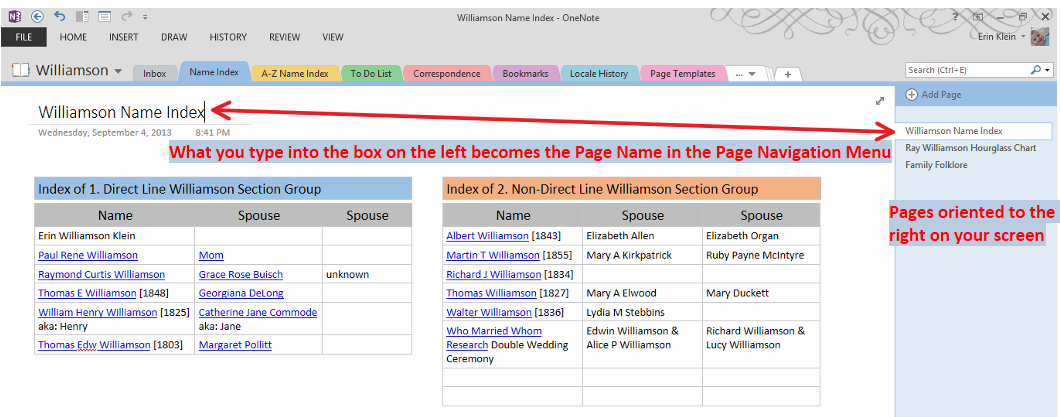
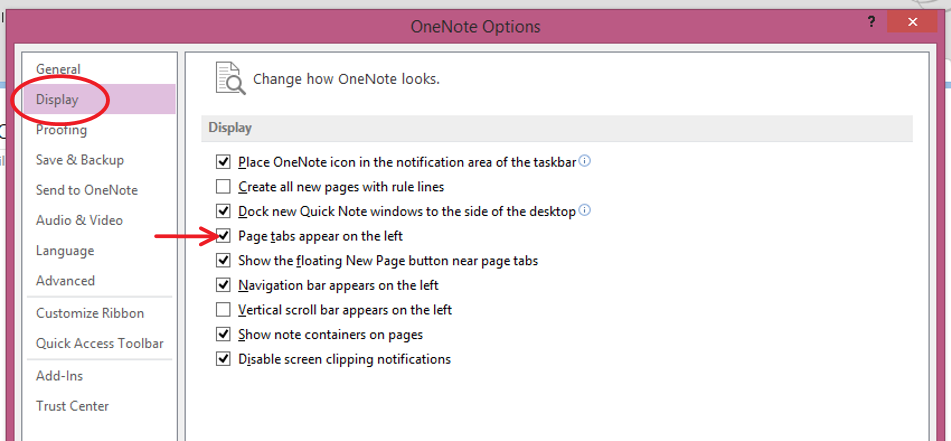
…or the left of your Notebook. I like my Pages listed on the left. To change the orientation of where the Pages are displayed in your Notebook, Click on File > Options > then choose Display. Check or uncheck the box: Page tabs appear on the left.

manage3

===

The easiest way to create new Pages is to Click > Add Page at the top of the Page Navigation Menu. An new untitled Page will appear at the bottom of your Page Navigation Menu. You can add new Pages by Right Clicking on the Page Navigation Menu and choosing New Page from the menu displayed. You can also use the shortcut: Ctrl+N.

manage4

Pages can be Moved by Clicking and Dragging them where you want them to appear in your Page Navigation Menu.

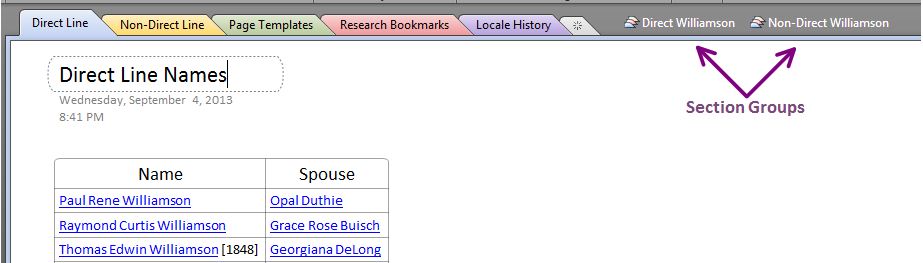
Subpages—shown as an indented Page name—can be easily created by Clicking and Dragging the Page tab to the right or by choosing > Make Subpage from the menu display that appears when you Right Click in the Page Navigation area. You can create as many Pages and Subpages as you need.

===

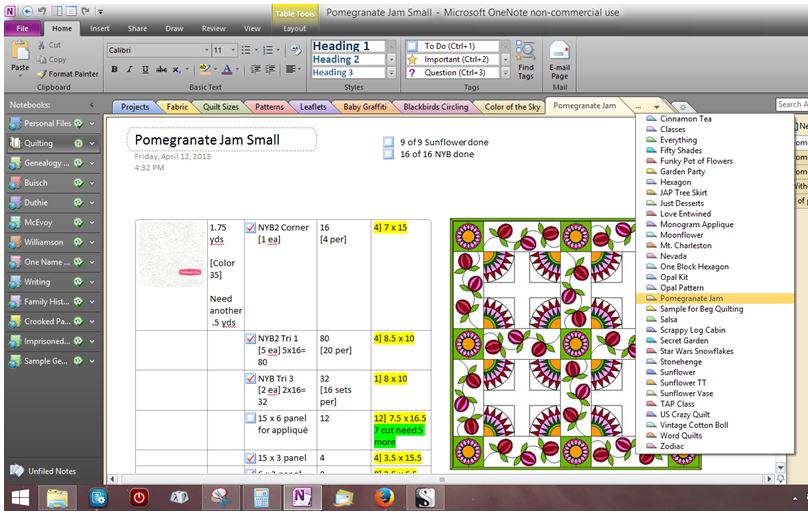
You can Move and Copy Pages to other Sections and other Notebooks if you find you need to reorganize your Sections and Notebooks. I have all my blank Page Templates saved in a Section at the front of my Surname Notebooks. I can easily copy those Pages to any of my Sections by Right Clicking on the Page Name and choosing Move or Copy

manage5

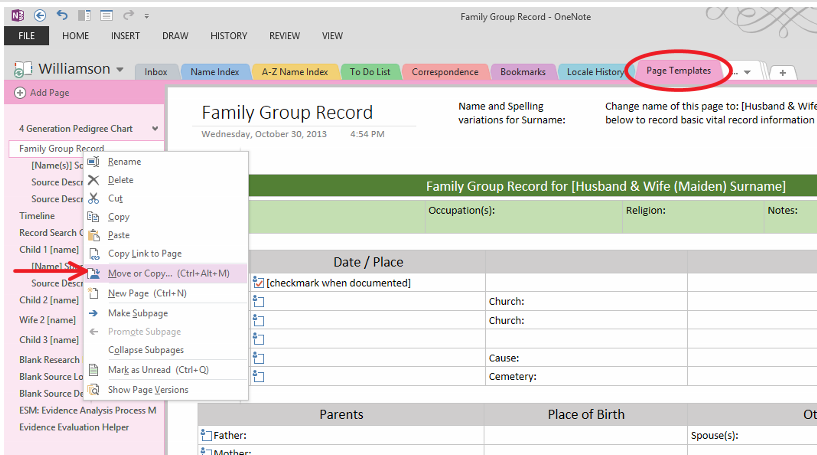
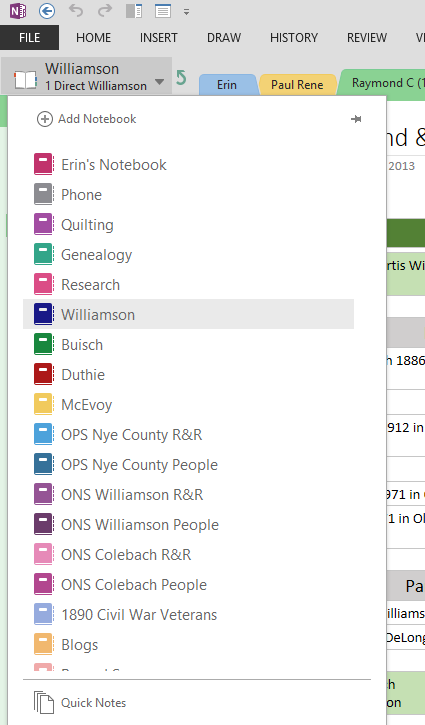
…a second window opens with a list of your Notebooks. Use the + to navigate to the Sections inside a Notebook. Choose the Section where you would like the Page to go. Be careful when you Click Move or Copy. I cannot tell you how many times I have chosen Move when I meant Copy! 

If you are just moving a Page within Sections of the same Notebook, you can Drag and Drop it where you want it to go.


manage6

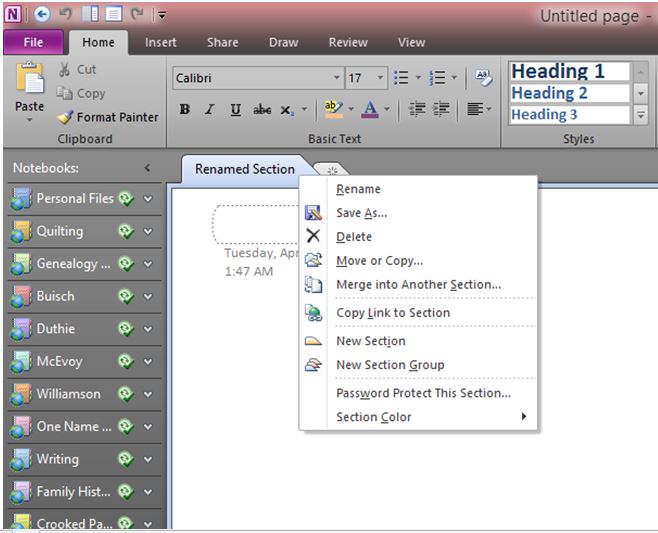
The same instructions apply when you are Moving or Copying full Sections as well. Right Click on the Section tab to see the menu that displays Move or Copy.

===

This page was updated on 14 April 2015 with new OneNote2013 screenshots and reworded to explain how to perform the tasks in ON2013. I deleted a portion on saving Pages as Templates in OneNote as I no longer save mine there.

===


Cite This Page:

Erin Williamson Klein, “Managing Pages in OneNote.” My Family History Files, 7 April 2014 (https://myfamilyhistoryfiles.com/organization/managing-pages-in-onenote: [access date]).

Please do not copy without attribution and link back to this page.


Posted on Leave a comment

Labeling Notebook Sections

L is for Labelingalphabet tree

Before I give you specific details on how I have my Notebooks set up, I first want to explain a little bit about how to label Sections and manage Pages [which will be my next post]. About labeling Sections… [lots of visual aids today! hahaha]

In the Notebook you created in yesterday’s post, your first Section is already created for you. To rename it, Right Click on the Section tab > Click Rename.

label1

===

To create new Sections, you can Right Click on any Section tab > Click New Section or Click the small Section tab just to the right of your last Section.

label2

===

You can create as many Sections as you need. If you create more Sections than will fit across the top of your Notebook, a Drop-Down Menu appears as the last Section tab. Click it to get the Drop-Down Menu.

Sections can be moved/rearranged by Clicking and Dragging them into any order you desire. In my Quilting Notebook,  I like to keep the Sections in alphabetical order [pictured below] so I am always rearranging them when I add a new Quilt Design Section tab.

label3

===

You can group Sections together and name them as a Section Group. Right Click on a Section tab > Click New Section Group. The Section Group appears at the top of your Notebook with the rest of your Sections. The Parent Group is the first grouping of Sections that you see when you first open your Notebook. In the example below, the Parent Group is: Direct Line, Non-Direct Line, Page Templates, Research Books and Locale History. You will only have a Parent Group if you set up other Section Groups.

label4

===

When you are in a Section Group, to get back to the Parent Group, Click the Green Arrow in the upper left corner of your Section tabs.

label5

===

Right Clicking on a Section tab gives you other options available for Sections. You can Move or Copy Sections to other Section Groups and even other Notebooks. You can Merge two Sections together. And you can change the Section tab color.

I am not sure if Section Password Protection is available for all versions of OneNote. I have heard that the free versions don’t have this option. I generally only use this option on a few of the Sections in my Personal Notebook.

label6

===

________________________________________________________________________________________

Cite This Page:

Erin Williamson Klein, “Labeling Notebook Sections.” My Family History Files, 5 April 2014 (https://myfamilyhistoryfiles.com/organization/labeling-notebook-sections: [access date]).

Please do not copy without attribution and link back to this page.

________________________________________________________________________________________

Posted on 7 Comments

Create a OneNote Notebook

Are you ready to create your first notebook in OneNote? I started with one notebook for each of my grandparents’ surnames. I added a fifth general genealogy information notebook later on and finally a “hold everything” research notebook to keep the odd bits of information and documents handy until I was ready to organize them.

With OneNote open, click on > File > New

create-1

The newest version of OneNote2013 does not let you save your notebooks on your hard drive anymore.  You have to chose OneDrive. In the space provided, name your notebook. Chose one of your Surnames. Click > Create Notebook.

You should now have a one-section, one-page notebook. Go ahead and make one for each of your four major surnames to get you started.

create-2

You can drag and drop your notebooks to rearrange them in any order you want.

===


Cite This Page:

Erin Williamson Klein, “Create a OneNote Notebook.” My Family History Files, 4 April 2014 (https://myfamilyhistoryfiles.com/organization/create-a-onenote-notebook: [access date]).

Please do not copy without attribution and link back to this page.