Are you ready to create your first notebook in OneNote? I started with one notebook for each of my grandparents’ surnames. I added a fifth general genealogy information notebook later on and finally a “hold everything” research notebook to keep the odd bits of information and documents handy until I was ready to organize them.
With OneNote open, click on > File > New
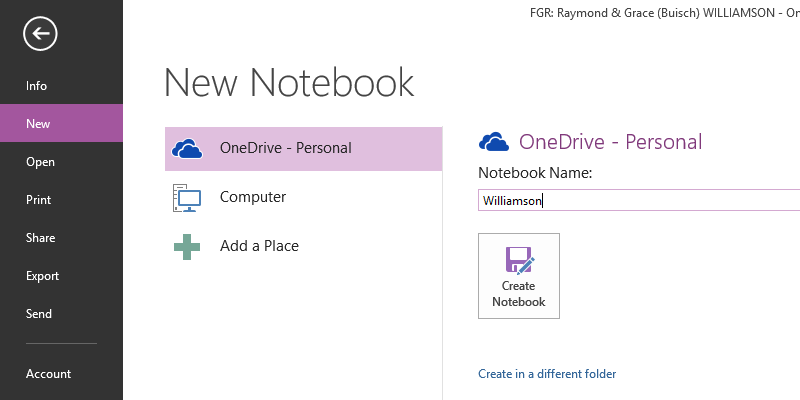
The newest version of OneNote2013 does not let you save your notebooks on your hard drive anymore. You have to chose OneDrive. In the space provided, name your notebook. Chose one of your Surnames. Click > Create Notebook.
You should now have a one-section, one-page notebook. Go ahead and make one for each of your four major surnames to get you started.
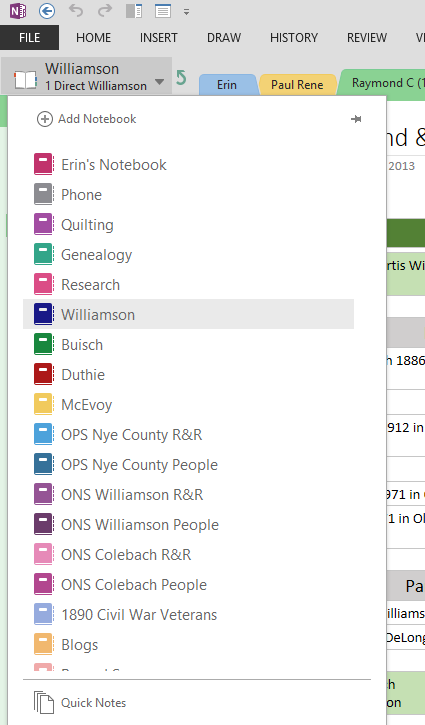
You can drag and drop your notebooks to rearrange them in any order you want.
===
Cite This Page:
Erin Williamson Klein, “Create a OneNote Notebook.” My Family History Files, 4 April 2014 (https://myfamilyhistoryfiles.com/organization/create-a-onenote-notebook: [access date]).
Please do not copy without attribution and link back to this page.
Because I am in the Evernote universe I am going to try your organisation techniques in Evernote. I like that you have started in a straightforward way :)
I am going to pin this so when April is over, I can go back and read all of this again and create my own OneNote Notebooks. Thanks for putting it out there.
http://yeakleyjones.blogspot.com/
I will be printing your blog posts out for future reference. As soon as I have more time I will be using setting up and using OneNote!
[…] My Family History Files keeping track of tracking down family members & their stories… « Create a OneNote Notebook […]
[…] your Notebooks: Whether you start with my Sample Genealogy Notebook or a Blank Notebook, give some thought to what you’d like to accomplish by using OneNote to further your […]
I bought OneNote several years ago intending to use it for Genealogy but have not gotten beyond using it for web clippings and filing them in surname notebooks. I am looking forward to learning more from you about how to make better use of OneNote. Thanks so very much.
Thanks for sharing. I began organizing my work in OneNote 2 years ago for the same reasons that you state. However, I became frustrated with the organization of my surnames, etc. I am inspired by reviewing your blog this morning. In OneNote, you can always “do over” and “rearrange.” After all, it’s digital.